Classroom Features, Technology Instructions, and Teaching Tips
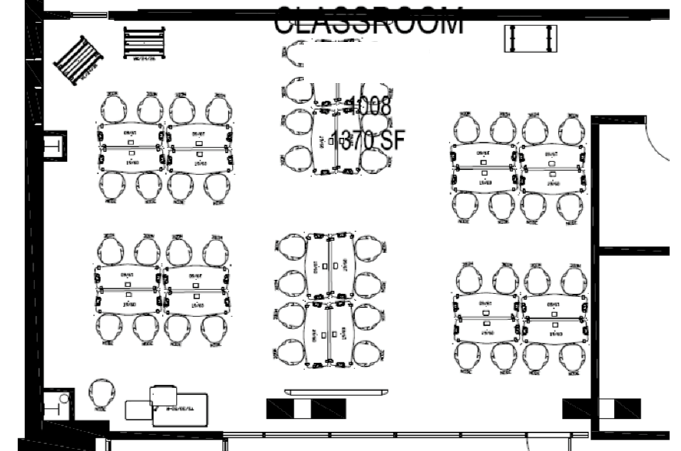
Horizon Hall Room 1008
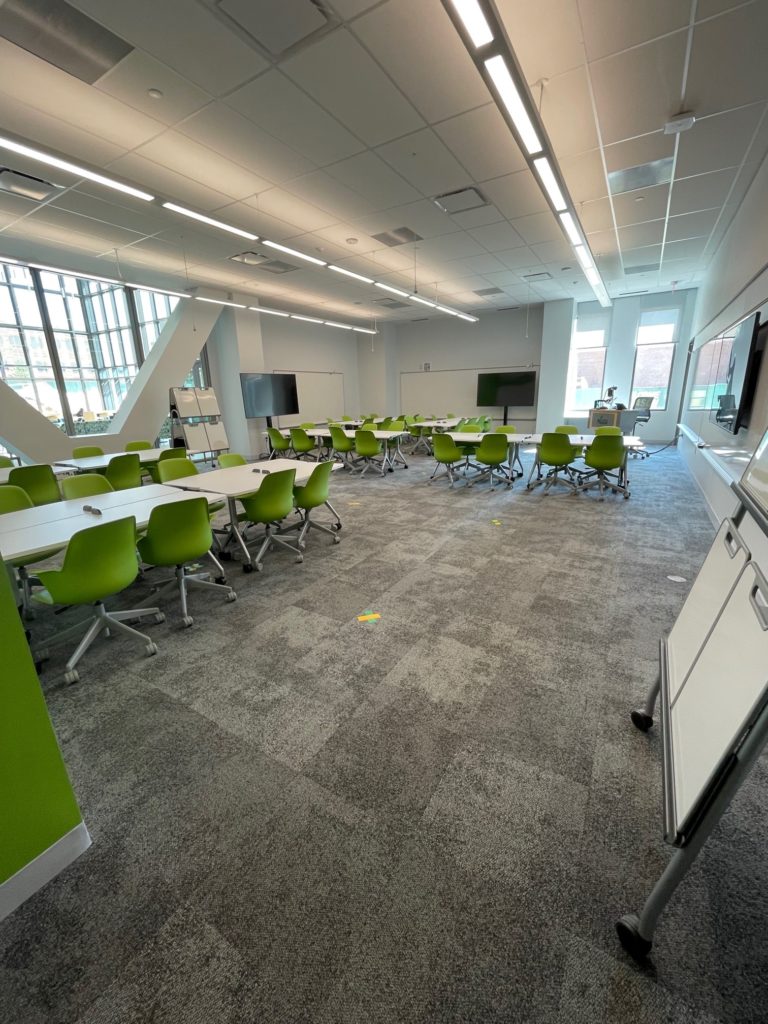
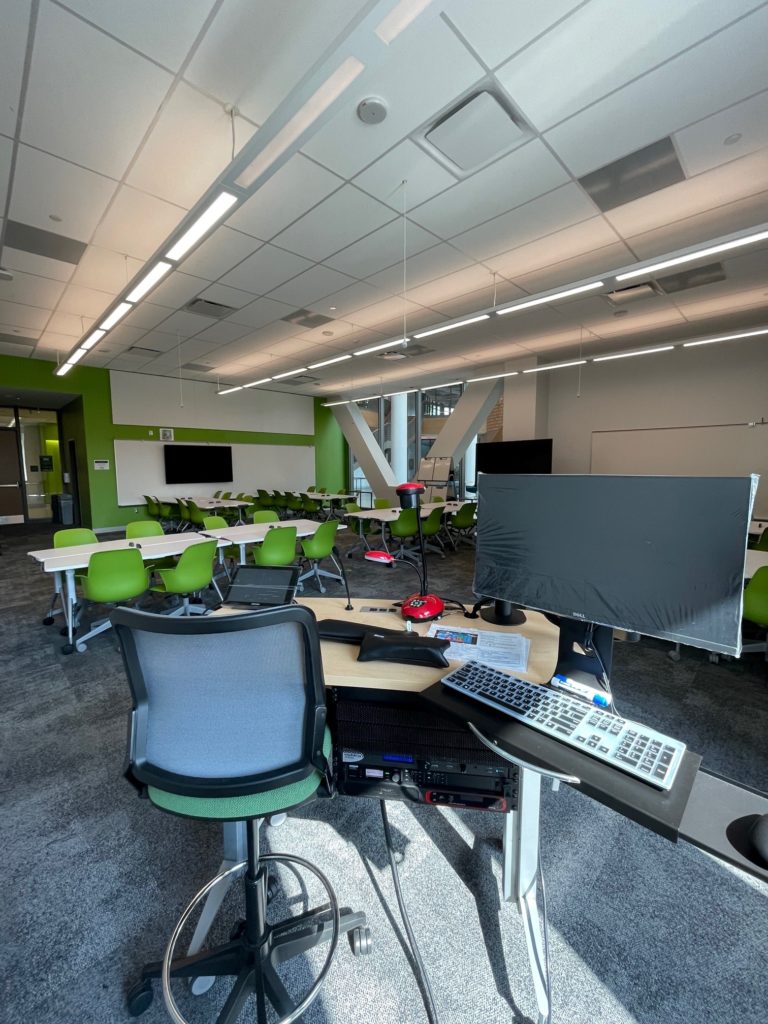
The diagram and photos show this exact room. For more information please see 25Live.
Instructors using this room are encouraged to move (or have students move) the furniture; there is no need to replace chairs and/or tables before the next class arrives. While it can initially be disconcerting for everyone to have some students sit facing away from the instructor, most instructors and student groups adapt to this change and grow to appreciate how the peer focus helps build community and engagement in the class without lowering student comprehension.
For general in-room questions, please see our FAQs and Troubleshooting page.
Classroom Features
Show All | Hide All
Moveable lectern with touch panel controllerUse this Feature to Support Active and Engaged Learning
- Leave the lectern: Although you can adjust the display and keyboard to allow you to sit or stand behind the lectern as you present information, this classroom has been designed specifically to encourage additional learning modes. As you plan each class session, you might envision other places in the room where you can stand or sit as you speak with, listen to, or observe your students in their learning.
- Support group interaction: Switch to Group mode so that clusters of students can work on their own parts of a project on a nearby screen. Groups could project a shared document or Blackboard wiki as they all type; a single student’s draft they are reviewing together; a problem or selection of text they are working on together.
- Go beyond Powerpoint: Switch to the document camera to work problems by hand on a notepad without turning your back to reach the whiteboard, or to show students a 3-D object up close (geological sample, artifact, small machine).
- For more teaching tips and examples, visit the Stearns Center’s Active Learning page.
Technology Instructions
- Note: The lectern can be relocated to several points in the classroom. If you desire to do so, please call support: 703-993-3456.
- Touch the panel screen on the console to start the system. In most classrooms, the display screen(s) will automatically turn on.
- Tap to select the appropriate source button for viewing.
- Other source options may include document camera, laptop, and/or wireless depending on the room options.
- See panel screen for volume control and screen-blanking options.
- For details on the usage and capabilities of the touch panel controller, please watch the tutorial video
Use this Feature to Support Active and Engaged Learning
- Model thinking and problem solving: Use the monitor to solve problems, annotate texts, or draw a diagram in real-time, while sharing your thought process: Turn the screen flat, open a whiteboard in Ink2Go to write or draw. Or ask a student to come up and model the work for the class. You can also then save the document and post it for your students to review later.
Technology Instructions
- If the PC is not already on, check that the touch panel is powered on, press the computer power button, or call support: 703-993-3456.
- Log in with MESA: Use your Mason username and password for MESA access.
- To use Ink2Go to annotate electronic documents, to capture snapshots or video of your screen, or to work on live whiteboards and save that work, see additional information here.
Use this Feature to Support Active and Engaged Learning
- Reporting out from in-class activities: Invite individual students or teams to connect their devices to the console to share the results of an in-class activity. After in-class work, not all participants or teams need to report out (this can get tedious), but asking a few to share increases accountability and helps spark discussion about the range of appropriate and innovative responses.
- Sharing student work and peer review: Invite individuals or teams to connect their devices to share in-progress drafts of their research, designs, lab reports, or problem sets. Students who present informally and take questions gain confidence and may gain helpful feedback or insight; more importantly, others in the class see real-time problem-solving from their peers and are often reassured that not everyone gets it right the first time. Help students focus their comments on how the document/problem could be improved and what they themselves can learn from it (rather than commenting on the abilities of the student presenting).
- For more teaching tips and examples, visit the Stearns Center’s Active Learning page.
Technology Instructions
- Locate the HDMI cable on top of the instructor console. (It may be located in the cable cubby.)
- Place the HDMI cord into the HDMI port on your device or the adapter. (If you do not have an HDMI port, you will need an adapter. If you are using an adapter, plug the adapter into your device.)
- Press the “HDMI” button on the touch panel controller to display your device’s screen. (The touch panel interface will indicate the selected source.)
- To troubleshoot issues related to sound and/or image display, see the FAQ page.
Use this Feature to Support Active and Engaged Learning
- Alternate between lecture and discussion: Allow students to maintain focus on your key information while also keeping eye contact with their group members.
- Support group interaction: Switch to Group mode so that clusters of students can work on their own parts of a project on a nearby screen. Groups could project a shared document or Blackboard wiki as they all type; a single student’s draft they are reviewing together; a problem or selection of text they are working on together.
- Broadcast directions or updates: Modify the slide you’ve broadcast to provide updates — or answers to questions that come up — to the instructions for group work that all students can check from their group.
Technology Instructions
- Touch the panel screen on the console to start the system. In most classrooms, the screen(s) will automatically lower.
- Tap to select the appropriate source button for viewing.
- Other source options may include document camera, laptop, and/or wireless depending on the room options.
- See panel screen for volume control and screen-blanking options.
Use this Feature to Support Active and Engaged Learning
- Leave the lectern behind: Whether you’re showing slides, demonstrating an online search, updating task directions, or taking notes on students’ ideas for research topics, you can do so using your laptop, tablet, or phone from anywhere in the room, standing or sitting. You are free to interact with groups and individuals as they work. Also, when students focus on the screen or on each other rather than on you, they often generate more attention to the problem or conversation at hand.
- Share student work:
- Whole class mode: Stay in Presentation mode, and invite individuals to connect wirelessly to share their drafts, problem sets, proposals, or relevant websites with the whole class. Students can share at the end of an activity, or you can invite one or two students to share their work part-way through. Not only do students get to see others’ approaches, but students who share their work in progress can revise or expand it in real-time as they receive guided feedback from their peers, helping everyone see the steps involved in learning. (Note: As students log in, you will see new user information appear on the screen.)
- Group work mode: Use the touch panel to switch to Group mode. Students in groups around the room can now have one team member connect to each of the in-room displays. Team members can collaborate using a shared document, a Blackboard discussion or wiki, or a brainstorming app like Jamboard; they can also switch presenters one at a time to share individual work for review and feedback. At any point, you can identify one team’s screen to share with the whole class.
- Let students lead: Wireless presentation not only works for formal student presentations but also lets you identify a student to “lead from the side” for a few minutes at any point in class. A student can share his/her/their screen, explain their challenges and choices, and draw connections to the overall conversation. Students might model their note-taking strategies, their programming choices, their research steps, their data analysis methods, or their design planning. (If you “cool call” students, letting them know at the start of class that you’ll be asking them to talk for a minute or two about a project or question, they may be more ready to step into this role.)
- For more teaching tips and examples, visit the Stearns Center’s Active Learning page.
Technology Instructions
- Use the touch-panel controller to select Wireless
- Open a browser on your device and enter the IP Address listed on the in-room display
- Click Connect or Get the app
- Type the 4-digit code displayed on the in-room screen into your device (the code will be different each time you connect)
- Follow the prompts to share your desktop, an application (Excel, Word, etc.) or a media file
- To troubleshoot related issues, see the Wireless Projection Resource Page.
Use this Feature to Support Active and Engaged Learning
- Keep all students in the loop: In a large, busy room, using the microphone ensures that all students, including those for whom English is not a native language, can understand all of your instructions and information, and can hear their peers reporting out even when those peers speak softly.
- Keep the learning active: The microphone saves time (you don’t have to repeat yourself), boosts energy (you don’t have to call for a complete stop to provide an update), and lets you operate efficiently (with a portable mic, you can speak from anywhere in the room rather than returning to the front or center).
- Build student confidence: Students who “take the mic” can gain presentation and communication skills and build their confidence in having a slightly more formal role in talking to their peers.
- For more teaching tips and examples, visit the Stearns Center’s Active Learning page.
Technology Instructions
- Once the system is powered on via the touch panel controller, the microphones can be used.
- The gooseneck is fitted in the lectern. The wireless microphones are located on top of the lectern in a black pouch.
- Power on the microphone (handheld) or the microphone receiver (lavalier) before each use.
- Use the touch panel controller for volume adjustments or muting.
- The student wireless microphones can be found sitting on their charging station on a moveable rack (Check that for each room)
- Note: the student microphones are effective for in-class usage, only. Not recommended when connecting virtually via Zoom, Blackboard Collaborate Ultra, or MS Teams. Please see the ” Cameras and ceiling microphones” section for more information.
Batteries must be replaced on a regular basis. Spare batteries will also reside in the drawer. For additional spare batteries, contact support: 703-993-3456.
Use this Feature to Support Active and Engaged Learning
- Engage with a guest speaker: Remember that your presenter is not just a talking head. Of course, they can join your class from anywhere: an office or field site, using a desktop or mobile device. But also, students can post questions and additional responses while they are talking, and you can use those both to help foster live discussion and to help students reflect on the presentation (even re-watching parts of the recording if necessary) after your presenter logs off.
- Include all students: Students in your classroom who have accessibility needs or who are reporting from a field site can join a class meeting; students from the class of a colleague down the road or around the world can join for a day or work collaboratively for several weeks on a project; students from a local middle school could share ideas online and then give mini-presentations to receive feedback from your class.
- For more teaching tips and examples, visit the Stearns Center’s Active Learning page.
Technology Instructions
- Touch the panel screen on the console to start the system
- Select the application of your choice i.e. Zoom, Blackboard Collaborate Ultra, or Microsoft Teams on the PC, Laptop, or tablet.
- See the touch panel controller for volume, cameras, microphones, and muting options
Use this Feature to Support Active and Engaged Learning
- Share your students’ finds: Remember that the doc cam can project a view from a student’s phone or tablet (though with varying image quality) and three-dimensional items as well as papers; your students’ backpacks and devices may have examples they can quickly share with the class using the doc cam. Using student examples can help strengthen connections between abstract concepts and their lived experience.
- Modified “gallery walk”: In a typical “gallery walk” exercise in a classroom with extended whiteboards, a team member can be selected to guide other students through the solution the team posted on the board as they move around the room. Here, using the doc cam, one or two students can bring a written record up to explain to the whole class; if the instructor selects these students at random, then all team members are always accountable for being ready to explain their team’s progress. Explaining and watching others explain the steps that led to a solution is a crucial element in retaining and transferring new knowledge.
- For more teaching tips and examples, visit the Stearns Center’s Active Learning page.
Technology Instructions
- Press the “DOC CAM” button on the touch panel controller to select the document camera as the source.
- Place the item on the white square or clear surface–the document should be placed face-up.
- For capturing photos and recording videos of your item, insert a USB device into the USB port on the document camera. Press the capture/delete button on the document camera’s control panel to capture a picture of the displayed image.
- Note: Only select document cameras support this functionality. For more tips and instructions, visit the Stearns Center’s Document Camera page.
Use this Feature to Support Active and Engaged Learning
- Match the attention focus to the activity: Rows focus students’ attention on a single presenter; a U-shape focuses students’ attention on the whole group for discussion; smaller pods or tables focus students’ attention on a team or partner for active learning or projects. If you brief students on your favorite room arrangements early in the term, you can ask them to quickly help you set the stage for the learning you plan to have happen.
- Get students up and moving: Clear the furniture away to the sides of the room to create an open space in the middle of the room for an icebreaker activity, a scavenger hunt, or a role-play–or move furniture to the middle of the room to allow students or teams more room at the whiteboards.
- Move between collaborative and individual workstations: Pushing tables or desks together facilitates partner and/or group work for activities like peer review, collaborative problem solving, small-group peer teaching, jigsaw reading and reporting out activities, group testing, or working with manipulatives (like Legos). Remember, group sizes and table configurations can be rearranged even within a class session if a subsequent activity calls for individual workspace for assessment activities or individual reflection or work.
- For more teaching tips and examples, visit the Stearns Center’s Active Learning page.
Use this Feature to Support Active and Engaged Learning
- Make students’ group work visible: When students work out problem sets on the whiteboards in pairs or small groups, it gives the instructor a chance to observe their ideas, where they might be getting stuck, or where they may have a particularly interesting contribution. Asking groups to share out their ideas from their public workspaces often leads to a greater variety of responses and can invite interesting debates and feedback from peers. (Hint: If you’ll use whiteboards regularly, you can ask students to purchase and bring their own markers.)
- Make learning and problem solving visual: Asking students to draw a concept map or a mental model of a concept or process on the whiteboard can be a helpful learning tool for visually or spatially-inclined students. It may be interesting to see how different pairs or groups of students imagine a similar idea.
- Elicit peer feedback in a round-robin fashion: Students may begin by drafting a problem statement or a proposal, drawing the first version of a diagram or model, or writing discussion questions or key ideas on the board. Then, you might have the students rotate in one direction to add comments, questions, feedback on their peers’ work until they return to their space to see what feedback has been left for them. This helps engage all students in pushing each other’s thinking while learning about their peers’ approaches to a similar problem or topic as part of the learning process.
- For more teaching tips and examples, visit the Stearns Center’s Active Learning page.
Technology Instructions
Note: Your classroom has two kinds of whiteboards. Students at the tables on the room’s perimeter may have access to the wall whiteboards, while students at the tables in the middle may use the hand-held whiteboards (which can hang onto and clip into the tables if desired).
- Well, it’s a whiteboard. 🙂
- More seriously, about markers: we recommend (a) requiring students to purchase and bring their own markers, (b) inspecting all student markers before they get used, to ensure they’re whiteboard markers that erase rather than some other kind, and (c) carrying your own backup markers.
- Erasers are important as well: students need to be able to change what they’ve written. Some faculty have suggested that students put the markers they’re required to purchase into a stray sock so that their marker carrying case doubles as an eraser. Cheap dishtowels cut into small squares (4″ – 6″) are also easy to carry and toss in the washer if you want to bring your own supply.