Classroom Features, Technology Instructions, and Teaching Tips
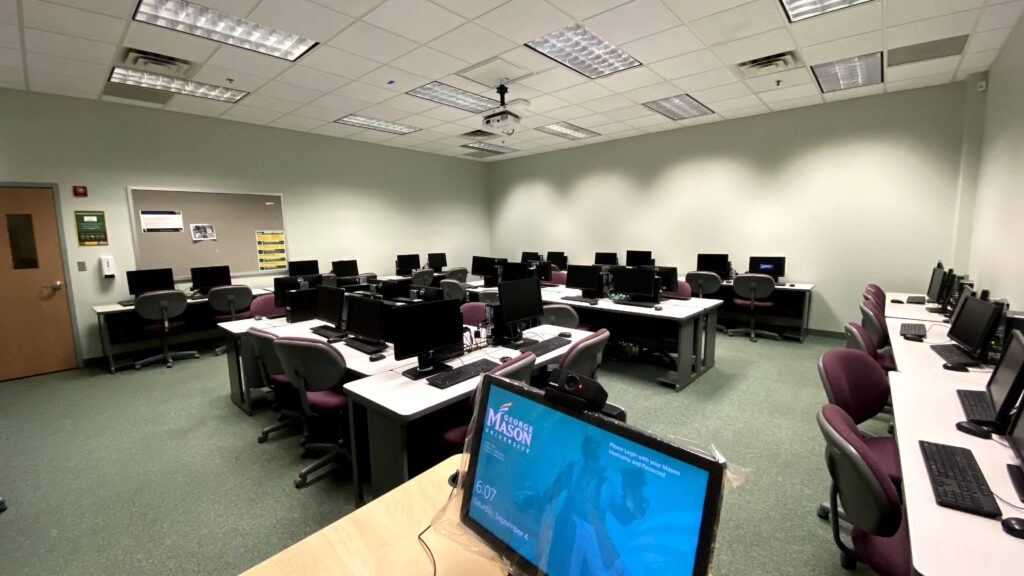
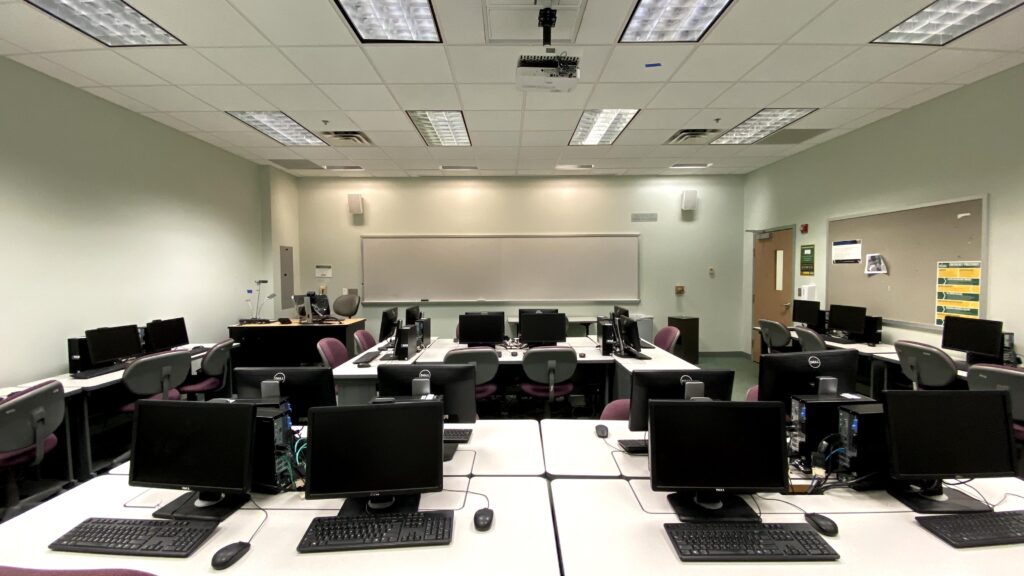
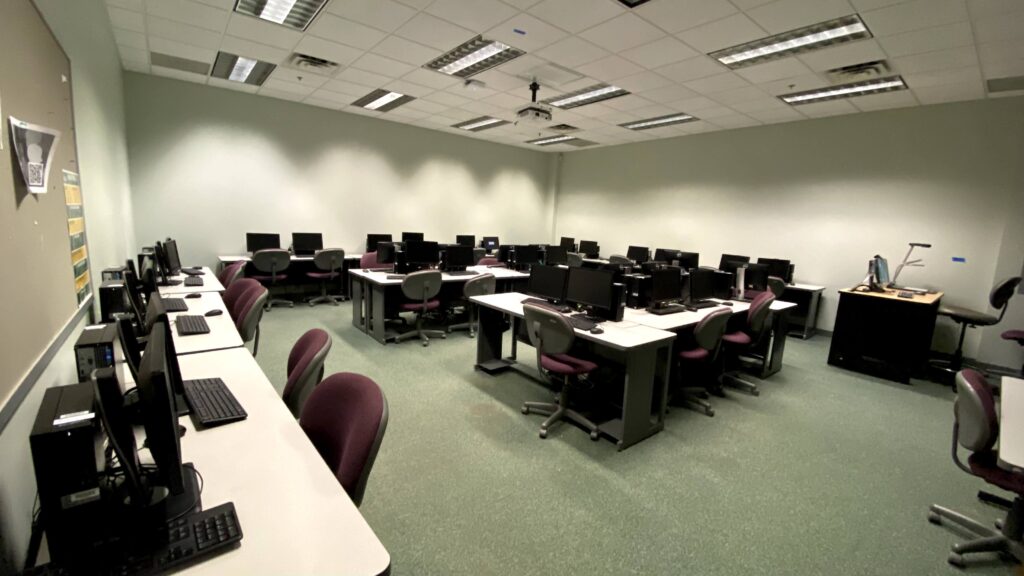
This photo gives a typical room view. For precise room capacity and photos showing the furniture and layout of your exact classroom, please log in to 25Live.
Please click the links below for more information.
Engaging students in the classroom
Engaged Learning
We encourage you to take advantage of classroom features to enhance teaching and engaged learning. Please scroll down for instructions on how to use these features.
| If you want to... | Consider active learning activities such as... | Use low technology options like... |
|---|---|---|
| Check understanding | Having students use a piece of their own paper. Supplying an index card for responses. |
|
| Encourage group discussion | Having students work with other students in the same row or on either side of them. | |
| Model problem solving | Having students work on a shared document that is then projected. | |
| Engage in interactive lecture | Having students work on a shared document that is then projected. Supplying an index card for responses. |
|
| Co-create learning experience in the classroom | Having students work with other students in the same row or on either side of them. Having students undertake peer review in Blackboard or Padlet. |
|
| Encourage peer instruction | Having students create digital presentations outside of class that are then projected. | |
| Show real world application | Having students use class time to work on a solution to the problem and give progress reports. |
Classroom Features
Show All | Hide All
Touch panel controllerUse this Feature to Support Active and Engaged Learning
Leave the lectern: Although you can adjust the display and keyboard to allow you to sit or stand behind the lectern as you present information, this classroom has been designed specifically to encourage additional learning modes. As you plan each class session, you might envision other places in the room where you can stand or sit as you speak with, listen to, or observe your students in their learning.
Support group interaction: Switch to Group mode so that clusters of students can work on their own parts of a project on a nearby screen. Groups could project a shared document or Blackboard wiki as they all type; a single student’s draft they are reviewing together; a problem or selection of text they are working on together.
Go beyond Powerpoint: Switch to the document camera to work problems by hand on a notepad without turning your back to reach the whiteboard, or to show students a 3-D object up close (geological sample, artifact, small machine).
For more teaching tips and examples, visit the Stearns Center’s Active Learning page.
Technology Instructions
- Touch the panel screen on the console to start the system. In most classrooms, the display screen(s) will automatically power on and the PC will be automatically selected.
- Tap to select the appropriate source button for viewing. Options may include a document camera, laptop, and/or wireless.
- Adjust the volume and screen-blanking options by touching the appropriate button on the touch panel.
- Watch the tutorial video, for details on the usage and capabilities of the touch panel controller
Use this Feature to Support Active and Engaged Learning
Model thinking and problem solving: Use the monitor to solve problems, annotate texts, or draw a diagram in real-time, while sharing your thought process: Turn the screen flat, open a whiteboard in Ink2Go to write or draw. Or ask a student to come up and model the work for the class. You can also then save the document and post it for your students to review later.
Technology Instructions
- If the PC is not already on, check that the touch panel is powered on, press the computer power button, or call support: 703-993-3456.
- Log in with MESA: Use your Mason username and password for MESA access.
- To use Ink2Go to annotate electronic documents, to capture snapshots or video of your screen, or to work on live whiteboards and save that work, see additional information here.
- All PCs are equipped to play DVDs. Put the DVD ROM in the player typically located in the top portion of the PC.
Supporting Active and Engaged Learning
Engage with a guest speaker: Remember that your presenter is not just a talking head. Of course, they can join your class from anywhere: an office or field site, using a desktop or mobile device. But also, students can post questions and additional responses while talking, and you can use those both to help foster live discussion and to help students reflect on the presentation (even re-watching parts of the recording if necessary) after your presenter logs off.
Include all students: Students in your classroom who have accessibility needs or who are reporting from a field site can join a class meeting; students from the class of a colleague down the road or around the world can join for a day or work collaboratively for several weeks on a project; students from a local middle school could share ideas online and then give mini presentations to receive feedback from your class.
For more teaching tips and examples, visit the Stearns Center’s Active Learning page.
Technology Instructions
- The webcam will automatically turn on when you start a meeting application i.e., Zoom, MS Teams, etc.
- It is designed to capture the instructor’s image and voice when at the teaching console.
- The webcam should not be rotated to capture the entire classroom as the picture and sound will be of low quality.
Use this Feature to Support Active and Engaged Learning
Reporting out from in-class activities: Invite individual students or teams to connect their devices to the console to share the results of an in-class activity. After in-class work, not all participants or teams need to report out (this can get tedious), but asking a few to share increases accountability and helps spark discussion about the range of appropriate and innovative responses.
Sharing student work and peer review: Invite individuals or teams to connect their devices to share in-progress drafts of their research, designs, lab reports, or problem sets. Students who present informally and take questions gain confidence and may gain helpful feedback or insight; more importantly, others in the class see real-time problem-solving from their peers and are often reassured that not everyone gets it right the first time. Help students focus their comments on how the document/problem could be improved and what they themselves can learn from it (rather than commenting on the abilities of the student presenting).
For more teaching tips and examples, visit the Stearns Center’s Active Learning page.
Technology Instructions
- Locate the HDMI cable on top of the instructor console. (It may be located in the cable cubby.)
- Place the HDMI cord into the HDMI port on your device or the adapter. (If you do not have an HDMI port, you will need an adapter. If you are using an adapter, plug the adapter into your device.)
- Press the “HDMI” button on the touch panel controller to display your device’s screen. (The touch panel interface will indicate the selected source.)
- To troubleshoot issues related to sound and/or image display, see the FAQ page.
Supporting Active and Engaged Learning
Alternate between lecture and discussion: Allow students to maintain focus on your key information while also keeping eye contact with their group members.
Support group interaction: Switch to Group mode so that clusters of students can work on their own parts of a project on a nearby screen. Groups could project a shared document or Blackboard wiki as they all type; a single student’s draft they are reviewing together; a problem or selection of text they are working on together.
Broadcast directions or updates: Modify the slide you’ve broadcast to provide updates — or answers to questions that come up — to the instructions for group work that all students can check from their group.
Technology Instructions
- This display may be either Projector(s) or LED Screen(s).
- Touch the panel screen on the console to start the system. In most classrooms, the screen(s) will automatically lower.
- Tap to select the appropriate source button for viewing.
- See panel screen for volume control and screen-blanking options.
- Other source options may include document camera, laptop, and/or wireless depending on the room options.
- See panel screen for volume control and screen-blanking options.
Use this Feature to Support Active and Engaged Learning
Share your students’ finds: Remember that the doc cam can project a view from a student’s phone or tablet (though with varying image quality) and three-dimensional items as well as papers; your students’ backpacks and devices may have examples they can quickly share with the class using the doc cam. Using student examples can help strengthen connections between abstract concepts and their lived experience.
Modified “gallery walk”: In a typical “gallery walk” exercise in a classroom with extended whiteboards, a team member can be selected to guide other students through the solution the team posted on the board as they move around the room. Here, using the doc cam, one or two students can bring a written record up to explain to the whole class; if the instructor selects these students at random, then all team members are always accountable for being ready to explain their team’s progress. Explaining and watching others explain the steps that led to a solution is a crucial element in retaining and transferring new knowledge.
For more teaching tips and examples, visit the Stearns Center’s Active Learning page.
Technology Instructions
- Press the “DOC CAM” button on the touch panel controller to select the document camera as the source.
- Place the item on the white square or clear surface–the document should be placed face-up.
- For capturing photos and recording videos of your item, insert a USB device into the USB port on the document camera. Press the capture/delete button on the document camera’s control panel to capture a picture of the displayed image.
- Note: Only select document cameras support this functionality. For more tips and instructions, visit the Stearns Center’s Document Camera page.
Supporting Active and Engaged Learning
- Check for students’ understanding in real time: The student PCs are preloaded with software with a few features helpful for checking in with students mid-class: the ‘Vote’ feature helps teachers to ask true/false or yes/no questions to the class while with the ‘Testing’ feature, tests and quizzes (multiple-choice, true/false, short answers) can be conducted to check the student understanding of the lesson.
- Collaborate with students/between students: Use OneDrive or another cloud software to collaboratively work with students or set students up to collaborate with each other (full-class or in small groups) on an in-class assignment, a revision of a writing assignment, a problem set, or another task. Students can all work together on one document or within separate documents. For further tips on using OneDrive in the classroom, see this resource.
- For more teaching tips and examples, visit the Stearns Center’s Active Learning page.
Instructions
- Log in with classroom access: Enter the classroom username and password as indicated on the splash screen located on the PC monitor.
- Instructor computer is loaded with classroom management software to see the student computers, broadcast instructor screen to student computers, shut down the internet, access Adobe suite – see user guide here.
- Student computers are loaded with Adobe Suite to support design, creation, and publication of digital media – see product overview page here.


