Rooms: Bull Run 130, 131, 134; Buchanan Hall D023; Enterprise Hall 80; Exploratory Hall L004; Founders Hall 111, 113; Innovation Hall 103; Music and Theater 1005; Planetary Hall 129
Classroom Features, Technology Instructions, and Teaching Tips
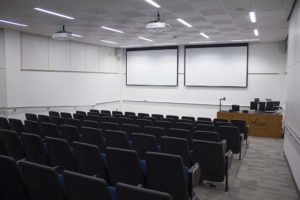
Typical Room View: For precise room capacity and photos showing the furniture and layout of your exact classroom, please log in to 25Live and click on the Locations tab. (You may need to create a 25Live account.)
Classroom Features
- Touch panel controller
- Instructor console with PC (Two computer monitors)
- Dual projection
- Laptop/tablet connection capability (HDMI)
- Document camera
- DVD capability
- Microphone
- FAQs and Troubleshooting
Technology Instructions and Teaching Tips
Show All | Hide All
Touch panel controllerInstructions
- Touch the panel screen on the console to start the system. In most classrooms, the screen(s) will automatically lower.
- Tap to select the appropriate source button for viewing.
- “PC Main” defaults to the LEFT monitor and LEFT projector. It features AUDIO for all content and supports all annotation.
- “PC Extended” defaults to the RIGHT monitor and RIGHT projector. There is no audio associated with content on this monitor.
- Other source options may include document camera, laptop, and/or wireless depending on the room options.
- See panel screen for volume control and screen-blanking options.
Instructions
- If the PC is not already on, check that the console screen is powered on, press the computer power button, or call support: 3-3456.
- Log in with MESA: Enter the classroom username and password as indicated on the splash screen or your Mason username and password for MESA access, respectively.
- “PC Main” defaults to the LEFT monitor and LEFT projector. It features AUDIO for all content and supports all annotation.
- “PC Extended” defaults to the RIGHT monitor and RIGHT projector. There is no audio associated with content on this monitor.
- To use Ink2Go to annotate electronic documents, capture snapshots or video of your screen, or to work on live whiteboards and save that work, see additional information here.
Supporting Active and Engaged Learning
- Model thinking and problem solving: Use the touch screen on the left like a doc cam and paper to solve problems, annotate texts, or draw a diagram in real time, while sharing your thought process: Turn the screen flat, open a whiteboard in Ink2Go, and use your stylus to write or draw. Or ask a student to come up and model the work for the class. You can also then save the document and post for your students to review later.
- Put students in the driver’s seat: When you have students lead class presentations or discussions, ask students to pre-load their slides from USB, OneDrive, or other cloud sites before class to save time. Remind any students who use Mac OS that some slides may display differently on this computer. Make sure they blank the screen to keep any login information private.
- For more teaching tips and examples, visit the Stearns Center’s Active Learning page.
Instructions
- The projector may take 20-30 seconds to power down, and 20-30 seconds to power up on restart.
- Your screen(s) will automatically roll down when you turn the system on.
- Once the system is on, an automatic screen can be manually controlled by the wall switch if needed.
- See “Touch Panel Controller” for more information on selecting and switching screen content.
Supporting Active and Engaged Learning
- Set up in-class group work efficiently: Use one screen to post the problem set or group activity instructions, and use the other to project an online timer or team roles to keep everyone on track. This will help all students, especially multilingual students, remember their tasks and stay on focused on learning.
- Combine and compare resources for problem solving: Project an informational resource (data set, code, text, essay rubric) on one screen and a problem or activity (directions, discussion questions, problem to solve, student sample essay) on the other. This allows all students to access both the problem and the information they might need to solve the problem at the same time.
-
Facilitate a backchannel conversation in real time: Project a live feed (e.g., PollEverywhere, Twitter, Blackboard chat) on one screen to collect students’ questions/responses to a lecture or a class activity while the other screen features presentation materials. This allows you to see the conversation happening in the classroom in real time, so that presenters can check the pulse of the room and ask/answer questions.
- For more teaching tips and examples, visit the Stearns Center’s Active Learning page.
Instructions
- Locate the HDMI cable on top of the instructor console. (It may be located in the cable cubby.)
- Place the HDMI cord into the HDMI port on your device or the adapter. (If you do not have an HDMI port, you will need an adapter. If you are using an adapter, plug the adapter into your device.)
- Press the “HDMI” button on the touch panel controller to display your device’s screen. (The touch panel interface will indicate the selected source.)
- Faculty may check out laptops and/or adapters for temporary use from Classroom Support Services in The Mix at Fenwick Library. For longer-term use, please consult your department.
- To troubleshoot issues related to sound and/or image display, see the FAQ page.
Supporting Active and Engaged Learning
- Reporting out from in-class activities: Invite individual students or teams to connect their device to the console to share the results of an in-class activity. After in-class work, not all participants or teams need to report out (this can get tedious), but asking a few to share increases accountability and helps spark discussion about the range of appropriate and innovative responses.
- Sharing student work and peer review: Invite individuals or teams to connect their device to share in-progress drafts of their research, designs, lab reports, or problem sets. Students who present informally and take questions gain confidence and may gain helpful feedback or insight; more importantly, others in the class see real-time problem-solving from their peers and are often reassured that not everyone gets it right the first time. Help students focus their comments on how the document/problem could be improved and what they themselves can learn from it (rather than commenting on the abilities of the student presenting).
- For more teaching tips and examples, visit the Stearns Center’s Active Learning page.
Instructions
- Press the “DOC CAM” button on the touch panel controller to select the document camera as the source.
- Place the item on the white square or clear surface–document should be placed face-up.
- For capturing photos and recording videos of your item, insert a USB device into the USB port on the document camera. Press the capture/delete button on the document camera’s control panel to capture a picture of the displayed image.
- Note: Only select document cameras support this functionality. For more tips and instructions, visit the Stearns Center’s Document Camera page.
Supporting Active and Engaged Learning
- Share your students’ finds: Remember that the doc cam can project a view from a student’s phone or tablet (though with varying image quality) and three-dimensional items as well as papers; your students’ backpacks and devices may have examples they can quickly share with the class using the doc cam. Using student examples can help strengthen connections between abstract concepts and their lived experience.
- Modified “gallery walk”: In a classroom with extended whiteboards, a team member can be selected to guide other students through the solution the team posted on the board as they move around the room. Here, using the doc cam, one or two students can bring a written record up to explain to the whole class; if the instructor selects these students at random, then all team members are always accountable for being ready to explain their team’s progress. Explaining and watching others explain the steps that led to a solution is a crucial element in retaining and transferring new knowledge.
- For more teaching tips and examples, visit the Stearns Center’s Active Learning page.
Instructions
- Press the ‘PC’ button on the touch panel controller to select the computer as the source.
- Insert the DVD disc into the computer DVD drive on the front of the computer.
Supporting Active and Engaged Learning
- Prepare for critical viewing: Students may need encouragement and practice to be critical viewers of video presentations. Consider doing a “trial run”: Ask an open-ended question that requires careful viewing and listening, play just a few minutes of your video, and then pause to check how many students noticed and connected the important details before you go to the rest of your video. (For one example of how “selective attention” works, see the basketball video here.) You may also consider using a viewing guide that includes questions to prime students to hone in on critical aspects of the material and scaffolds the learning process.
- Use predictions to strengthen attention and analysis: Before you start the video, it can be helpful not just to share some discussion questions with your students, but to ask them what they already think the answers might be. This pre-viewing discussion will help reveal their prior knowledge and engage their interest so that new ideas will be more likely to “stick” to or, if needed, replace earlier ideas.
- For more teaching tips and examples, visit the Stearns Center’s Active Learning page.
Instructions
- Once the system is powered on via the touch panel controller, the microphones can be used.
- The microphones are located within a drawer in the instructor console or credenza.
- Power on the microphone (handheld) or the microphone receiver (lavalier) before each use.
- Use the touch panel controller for volume adjustments or muting.
- Note: Batteries must be replaced on a regular basis. Spare batteries will also reside in the drawer. For additional spare batteries, contact support: 3-3456.