Classroom Features, Technology Instructions, and Teaching Tips
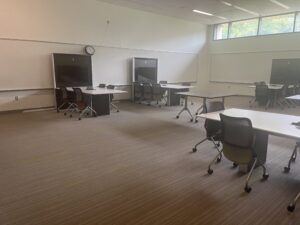
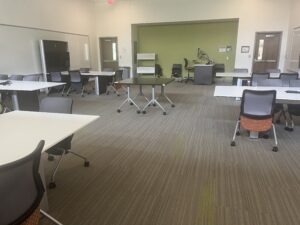
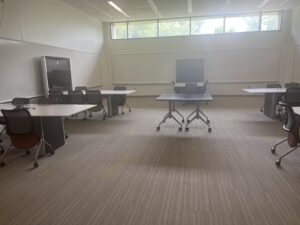
This photo gives a typical room view. For precise room capacity and photos showing the furniture and layout of your exact classroom, please log in to 25Live.
Classroom Features
- Instructor credenza with PC
- Flat screens at student tables
- Document camera
- Five tables
- Continuous white boards on three walls
- ***Illustrated Quick Start Guide
- FAQs and Troubleshooting
Technology Instructions and Teaching Tips
Show All | Hide All
Instructor credenza with PCInstructions
- Note: This small credenza has been positioned against the wall to maximize flow within the classroom and is designed with a moveable display arm that allows instructor to either sit or stand while operating the PC. An additional instructor table is provided.
- If the PC is not already on, check that the console screen is powered on, press the computer power button, or call support: 3-3456.
- Log in with classroom access or MESA: Enter the classroom username and password as indicated on the splash screen or your Mason username and password for MESA access, respectively.
- To use Ink2Go to annotate electronic documents, to capture snapshots or video of your screen, or to work on live whiteboards and save that work, see additional information here.
Supporting Active and Engaged Learning
- Leave the lectern: Although you can adjust the displays and keyboard to allow you to sit or stand behind them as you present information, this classroom has been designed specifically to encourage additional learning modes. As you plan each class session, you might envision other places in the room where you can stand or sit as you speak with, listen to, or observe your students in their learning.
- Model thinking and problem solving: Use the touch screen on the left like a doc cam and paper to solve problems, annotate texts, or draw a diagram in real time, while sharing your thought process: Turn the screen flat, open a whiteboard in Ink2Go, and use your stylus to write or draw. Or ask a student to come up and model the work for the class. You can also then save the document and post for your students to review later.
- For more teaching tips and examples, visit the Stearns Center’s Active Learning page.
Instructions
- Touch the panel screen on the console to start the system. In this classroom, all TV screen(s) will automatically power on.
- Tap to select the appropriate source for viewing. Console PC is the default source.
- Select the desired mode, Presentation or Huddle, and then the desired source (to include the content at each student table.)
- Select “Presentation” to allow a single source to be shown on all student table displays. Select “Huddle” to display student video/content at each distinct table.
Supporting Active and Engaged Learning
- Adapt to the decentered room: Just as a faculty member who wants to do group work in a lecture hall has to create extra strategies and protocols to engage learners, a faculty member who wants to give a presentation or conduct a full group discussion in this room may have to design and share new strategies. If you need students to pivot their chairs, close their technology, or speak up in order to best engage as learners at some points, help them get used to those steps. But also look for ways that you can work with the room’s advantages: where can you substitute more team-based learning approaches for what used to be whole-group activities?
- Work with norms and variations: Team and group learning works best within established norms. You can help set some initial norms (about starting and completing tasks, about including team members, about quieting down at an agreed time or sound) but you can also enlist students’ help in setting norms, as a whole class and team-by-team (for large projects, group contracts are beneficial). Stable groups and stable procedures (starting each class with a similar exercise) can be useful, but so can variance: new groups, options for mini-lectures or full-class discussions or individual work, groups working at the whiteboards as well as on screen.
- Balance discovery with sharing: This classroom provides multiple ways for students to make their learning visible to you and to other students. Group discussion, online collaboration through Blackboard or OneDrive, problem solving or brainstorming at whiteboards: all these provide opportunities not just for generating ideas but for reporting out. (Hint: If a random team member can be called on for each report, then all team members need to be engaged.) Not all learning needs to be shared or assessed; sometimes a draft or discussion is sufficient in itself, and having all teams share out can unnecessarily slow learning.
- For more teaching tips and examples, visit the Stearns Center’s Active Learning page.
Instructions
- Press the “DOC CAM” button on the touch panel controller to select the document camera as the source.
- Place the item on the white square or clear surface–document should be placed face-up.
- For capturing photos and recording videos of your item, insert a USB device into the USB port on the document camera. Press the capture/delete button on the document camera’s control panel to capture a picture of the displayed image.
- Note: Some document cameras such as the Wolfvision XXX will not include the capture/recording feature.
Supporting Active and Engaged Learning
- Share your students’ finds: Remember that the doc cam can project a view from a student’s phone or tablet (though with varying image quality) and three-dimensional items as well as papers; your students’ backpacks and devices may have examples they can quickly share with the class using the doc cam. Using student examples can help strengthen connections between abstract concepts and their lived experience.
- Modified “gallery walk”: In a classroom with extended whiteboards, a team member can be selected to guide other students through the solution the team posted on the board as they move around the room. Here, using the doc cam, one or two students can bring a written record up to explain to the whole class; if the instructor selects these students at random, then all team members are always accountable for being ready to explain their team’s progress. Explaining and watching others explain the steps that led to a solution is a crucial element in retaining and transferring new knowledge.
- For more teaching tips and examples, visit the Stearns Center’s Active Learning page.
Supporting Active and Engaged Learning
- Match the attention focus to the activity: Rows focus students’ attention on a single presenter; a U-shape focuses students’ attention on the whole group for discussion; smaller pods focus students’ attention on a team or partner for active learning or projects. If you brief students on your favorite room arrangements early in the term, you can ask them to quickly help you set the stage for the learning you plan to have happen.
- Get students up and moving: Clear the furniture away to the sides of the room to create an open space in the middle of the room for an icebreaker activity, a scavenger hunt, or a role play–or move furniture to the middle of the room to allow students or teams more room at the whiteboards.
- Move between collaborative and individual work stations: Pushing tables or desks together facilitates partner and/or group work for activities like peer review, collaborative problem solving, small group peer teaching, jigsaw reading and reporting out activities, group testing, or working with manipulatives (like Legos). Remember, group sizes and table configurations can be rearranged even within a class session if a subsequent activity calls for individual work space for assessment activities or individual reflection or work.
- For more teaching tips and examples, visit the Stearns Center’s Active Learning page.
Supporting Active and Engaged Learning
- Make students’ group work visible: When students work out problem sets on the white boards in pairs or small groups, it gives the instructor a chance to observe their ideas, where they might be getting stuck, or where they may have a particularly interesting contribution. Asking groups to share out their ideas from their public workspaces often leads to a greater variety of responses and can invite interesting debates and feedback from peers. (Hint: If you’ll use white boards regularly, you can ask students to purchase and bring their own markers.)
- Make learning and problem solving visual: Asking students to draw a concept map or a mental model of a concept or process on the white board can be a helpful learning tool for visually or spatially-inclined students. It may be interesting to see how different pairs or groups of students imagine a similar idea.
- Elicit peer feedback in a round-robin fashion: Students may begin by drafting a problem statement or a proposal, drawing a first version of a diagram or model, or writing discussion questions or key ideas on the board. Then, you might have the students rotate in one direction to add comments, questions, feedback on their peers’ work until they return to their space to see what feedback has been left for them. This helps engage all students in pushing each other’s thinking while learning about their peers’ approaches to a similar problem or topic as part of the learning process.
- For more teaching tips and examples, visit the Stearns Center’s Active Learning page.